How To Transplant Gladiolus and Replant It (From Indoors and Garden)
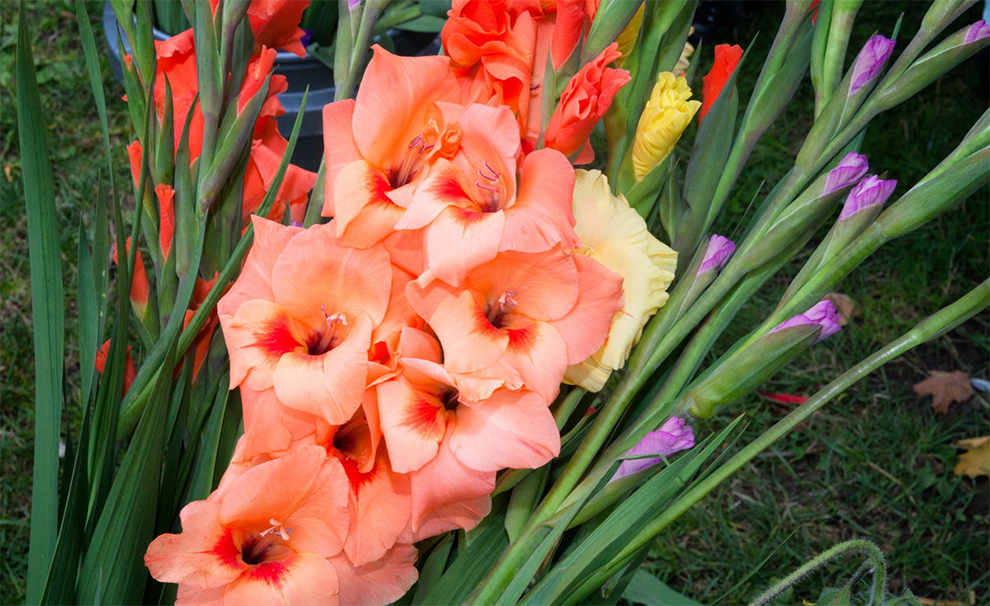
Did you know the name ‘Gladiolus’ originates from the Latin word ‘Gladius’ that means “Sword”? It is for this reason that the gladiolus flowers are also called “sword lilies”. Gladiolus is a bulbous plant native to South Africa famous for its bright and colorful blooms. It is available in a variety of colors such as yellow, pink, purple, white, burgundy, red, orange, etc. These flowers work as a great addition to floral bouquets and midsummer gardens.
Though this plant is hardy and requires minimal care, you still need to be aware of the right environment and other requirements for transplanting gladiolus. So, if you are a beginner in gardening you may want to learn how to transplant gladiolus in the right manner.
In this article, we will tell you step-by-step guide on how to transplant gladiolus from indoors (stored corms) and how to replant gladiolus from the garden. We will also tell you when is the right time to transplant gladiolus and give you care and precautionary tips to be kept in mind.
In This Article
- How To Grow Gladiolus?
- What Is Transplantation? When and How To Transplant Gladiolus?
- Tools And Other Preparations Needed
- Step-By-Step Replantation Guide
- Care Tips And Precautions To Be Kept In Mind
- Enhancing Your House Interiors With Gladiolus
- Frequently Asked Questions
- Conclusion
How To Grow Gladiolus?
Gladiolus grows best in sunny areas that have well-drained sandy loam soil. A well-drained soil can be achieved by mixing compost in your planting beds. Therefore, if you have a kitchen garden in your backyard, the same environment will work well to transplant gladiolus. Also, gladiolus are not very accommodating to weeds and other plants, therefore, it is best to have a clear area around them.
Talking about the method of plantation, this plant is usually propagated using its flat round corms. However, gladiolus can also be germinated through seeds, though it will take years before the plant produces its first bloom. It is for this reason that most of the gardeners use bulbs to transplant gladiolus to get quicker results.
What Is Transplantation? When and How To Transplant Gladiolus?
Transplantation involves moving your gladiolus plant from one place to another which can be done for several reasons such as not enough sunlight in the current spot, overcrowded flower bed, or when you want to redesign your garden.
While it is safe to transplant gladiolus at any time of the year (as long as it is done carefully), the gladiolus bulbs are generally transplanted in early spring to enjoy their bloom throughout the summers. The best time for planting gladiolus corms is when you are past the threat of frost and the soil is warm enough for germination (around 55°F). You can either transplant gladiolus by germinating them in water or by carefully scooping out a growing shoot during its growing season.
Even though this plant is perennial, the corms of the plant do not respond well to cold temperatures. So, if you live in a colder zone (USDA zone 6 or below) and want to know how can you transplant gladiolus in the summer, you should preferably remove gladiolus bulbs from the soil and store them indoors.
To do so, wait for the growing season to end, which will be the year’s first frost. Chop off any remaining foliage down to an inch, and use a trowel to extract the gladiolus corms from the soil. Scrape out any rotten or damaged part of the bulbs. Also, separate out any splitting bulbs. Scrape off the excess dirt and place the bulbs in a warm and airy location to let them cure for one or two weeks. When the corms are dry enough, put them in a paper bag and store it away in a cool and dry place.
Since it takes between 70 to 90 days for gladiolus to begin flowering, you should ideally plant it two weeks before the last expected spring frost. Once the winter season passes, and the local foliage starts showing signs of regeneration, it is time to transplant the bulbs to a sunny and well-drained spot in your garden. To enjoy a continuous harvest, you should plant a few corms every two weeks so that all the flowers do not bloom at once but keep your garden colorful until early fall.
Also, if you want to create a bed of gladiolus flowers, there should be a space of at least 5 inches between two corms to provide them enough space to grow.
Before you begin learning how to transplant gladiolus, make note of the planting requirements, and gather all your supplies to transplant gladiolus.
How To Replant Gladiolus – Tools and Other Preparations
If you have landed here searching “How can you transplant gladiolus in the summer?” You will require the following tools.
- Garden scissors
- Gardening gloves
- Trowel
- Drain spade
- Paper bag
- Mulch
- Compost
- Bowl/dish
To begin learning about how to transplant gladiolus you will first have to do a couple of preparations.
- Spot a location in your garden that receives full sun.
- You will need well-drained soil that is moderately fertile. The bulbs tend to rot in heavy and soggy soils.
- Use a garden fork to loosen out the soil. Till the soil for about 12 to15 inches deep. Mix a 2 to 4-inch layer of your preferred compost to this soil bed.
- Put a layer of mulch over the soil where the bulbs will be transplanted. This will help to maintain the moisture content for the growing state and also prevent the growth of weeds.
You might also like to read about how to get rid of goat head weeds.
Now that all your preparations are in place, it is time to learn how to transplant gladiolus that has been stored indoors during winters and how to replant gladiolus that is already growing in your garden to a different location.
How To Replant Gladiolus: Step-By-Step Guide
a. Transplanting From Indoors
- To transplant gladiolus, take a shallow bowl or a dish and fill it with ¼ inch of water.
- Put the bulb upright in the dish and put it on a windowsill that receives bright and filtered sunlight. The warmth and the moisture will help the bulb to germinate.
- Wait for the tip of the germinating bulb to grow 5 inches long.
- Use the drain spade to dig 8 inches deep holes in the planting bed. If you plan to grow a cluster of gladiolus, there should be a gap of five inches between each hole to ensure that there is no competition for space and nutrients.
- Place one bulb in each hole with the germinating tip facing upwards.
- In case the growing tip is less than 5 inches, bury the tip completely under the soil. However, make sure that you do not damage the shoot.
- Once you have successfully transplanted all the bulbs, water the area heartily to give the bulbs a well-drained soil bed. Keep watering the area regularly to ensure they get the right moisture to grow quickly.
b. How To Transplant Gladiolus From The Garden (During The Growing Season)
Many beginners ask us “Can you transplant gladiolus in the summer?” The answer is very much a YES, provided you do it in the right manner on the right day.
- Choose a cloudy day or a late afternoon to transplant gladiolus to avoid putting them under the stress of the sun.
- Put on your gardening gloves and use the drain spade to dig 10 inches holes in the area where you wish to transplant gladiolus
- Fill up the holes with water and let them drain. Repeat a few more times and wait for 20 minutes to check if the soil is sufficiently moist but not muddy.
- Simultaneously water the gladiolus plant before you remove it for transplantation.
- Use the drain spade to dig out a deep circle around the plant. The circle should be at least 10-inch deep.
- Keeping the roots intact, carefully dig out the plant from the soil.
- If needed, using a trowel adjust the size of the new hole where you will transplant gladiolus. Then gently place the plant into the new hole.
- Fill the hole up to half of the way with soil and firm it down with your fingers.
- Pour water into the hole and fill up the rest of the hole with soil. However, do not apply too much force to push the soil into the hole.
- The newly transplanted plants will need more care during the first week of transplantation. You can provide them temporary shade for the first two or three days and also irrigate them with extra water. However, you do not want to make a puddle in the soil. So do everything in moderation to provide the right environment for plant growth.
Care Tips and Precautions To Be Kept In Mind
Now that you have learned how to replant gladiolus, here are a few tips that will help you to take better care of your plant to ensure a full bloom. Plus, you should also be aware of the diseases and pests that usually affect the gladiolus.
- Adding 2 to 4 inches of mulch over the soil bed will help maintain the soil moisture and reduce watering frequency.
- Remove the weeds regularly as they tend to take away the nutrients from the soil.
- If your area receives less than 1 inch of rainfall per week in the summer, you must water your plant regularly to maintain optimum moisture in the soil.
- Once the plant is 6 to 10 inches tall, use a water-soluble fertilizer 6 inches away from the stem. Go for another round of fertilizer once the flower spikes begin showing colors.
- Keep removing the wilted flowers to make space for newer blooms.
- Once the entire stalk has bloomed cut off the stalk at about 2 to 3 inches from the base so that it can grow again in the next season.
- Support the tall variety with stakes to keep the flower stalks upright.
- Some of the common diseases that affect the gladiolus are corm rot, Fusarium wilt, aster yellows, and gray mold. Gladioli also need to be protected against thrips, aphids, and spider mites. You can spray an insecticide such as Confidor or MaxGuard to protect the developing buds.
Enhancing Your House Interiors with Gladiolus
If you have got a gladiolus bounty, here are a few tips to use them for decorations:
- If you are growing this plant for cut flowers, plant the corms in rows as you would plant any vegetable.
- To use gladiolus for flower arrangement cut the stalk before the blooms open.
- Always cut the stalk either early morning or in the evening since the sun puts more stress on the plant during the day.
- Always use a sharp knife to cut through the stalk diagonally. Do leave a few leaves on the plant to help it regrow for the next season.
- Place the cut flowers in a bucket of water in a dark and cool place before you arrange them in a vase.
- Keep removing the lower fading flowers and crop the stalk at least by an inch every few days to prevent rot.
Some of the recommended gladiolus varieties are Candyman (deep pink), Dream’s end (orange), Prins Claus (white), Black Star (deep purple), and Glamini.
Frequently Asked Questions
Will gladiolus bulbs multiply?
The gladiolus form a flat bulb like structure known as corm. When you dig the large corms out during fall, you will find tiny cormlets growing from the bottom of the large bulb. So, yes, the corms do multiply if they get the right environment to thrive.
How do you divide gladiolus?
The main new corm grows on top of the old corm. The tiny cormlets also grow out of the old corm.
To divide gladiolus, carefully remove the main new corm from the top. Also, pry off the cormlets. Discard any damaged or unhealthy corm. Plant these new corms during the spring season. However, don’t expect them to flower the same year. They will develop into mature bulbs and will be ready to flower in the next season.
How do you keep the gladiolus blooming?
Maintaining a well-drained moist soil and a bright sunny spot will ensure a full and healthy bloom. Appling a layer of mulch will also protect your plant from weed growth and provide the needed moisture to the soil. Using a water-soluble fertilizer for flowering plants will ensure bright and big blooms. However, make sure that you mix the fertilizer well with water to avoid burning out the bulbs.
How to replant gladiolus to bloom more than once?
Gladiolus blooms only once per season. So, if you want your garden to stay colorful throughout the summer, you may want to plant the bulbs in intervals of two weeks to get a constant bloom.
Conclusion
Gladioli can add up to the beauty of your garden area. They are the perfect choice to beautify a corner of your home with a flower arrangement too. Their big and vibrant blooms with a rich palette of colors can uplift any dull area.
Now, this brings us to the end of how to transplant gladiolus guide. Hope you were able understand how to correctly transplant the gladiolus and care for the plant.