How To Plant and Grow Daylily Seeds?
Daylilies can be propagated through seeds easily. Sow them around spring around an inch deep in moist soil rich in organic matter after soaking and stratifying them.
It is easy to grow daylilies from seeds. All it takes is a little patience and time. If you follow the correct techniques, the seeds are easy to grow, and the anticipation that new blooms bring is exciting.
Every single daylily seed provides the potential for a new hybrid or cultivar, and every seed is unique. You can plant them about ½ – ¾ inch deep in moist rich soil for best results.
Daylilies are one of the most supremely popular perennials in the flower garden, and it is apparent why. They come in various sizes and colors and are reliable, versatile, and easy to grow. But how to grow daylilies from seed if you wish to spread these beauties?
Well, it is possible to divide your daylilies every few years. However, if you want to try something different, why don’t you germinate and collect your daylily seeds? Read below as we discuss the entire drill for growing the daylilies from seeds.
How To Harvest & Collect Daylily Seeds?
It is a three-way process: Pollination – Waiting for healthy seeds to appear – Collecting them.
Naturally, if you want to know how to plant daylily seeds, the first thing you need is the seeds. So, read below as we discuss the seed collection process.
Step 1 – Pollination
Daylilies are not self-fertile. Hence, pollinate the daylily blooms first. The pollens have to come from a different plant. Fortunately, it can be interesting to cross the different daylily varieties and yield hybrids by hand-pollinating the flowers.
Now, eliminate the pollen-veiled Anther from inside one flower and bring it in contact with the Pistil of the flower from the different plants for pollination.
Pistil and Anther lie in the flower’s nucleus. The former is the female part and contains the ovary at its base, along with a long tube that travels up and comes off the flower. Anthers wrapped in pollens envelop the Pistil and nestle on the filament or the thin stem.
Pollen is the yellow, fine dust. Please remember hand pollination should be done in the morning when the pollen is sticky and moist.
Step 2 – Wait
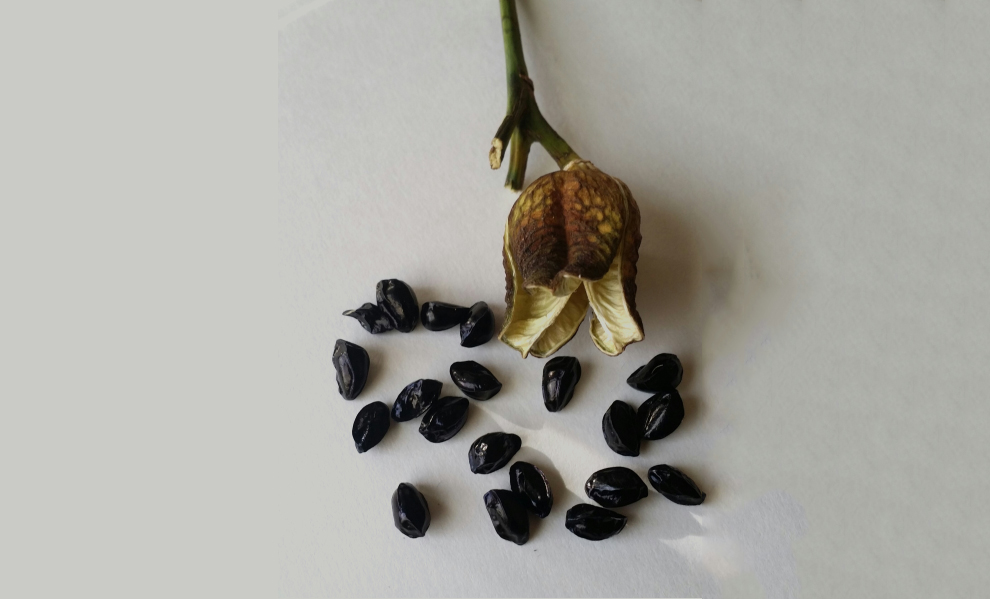
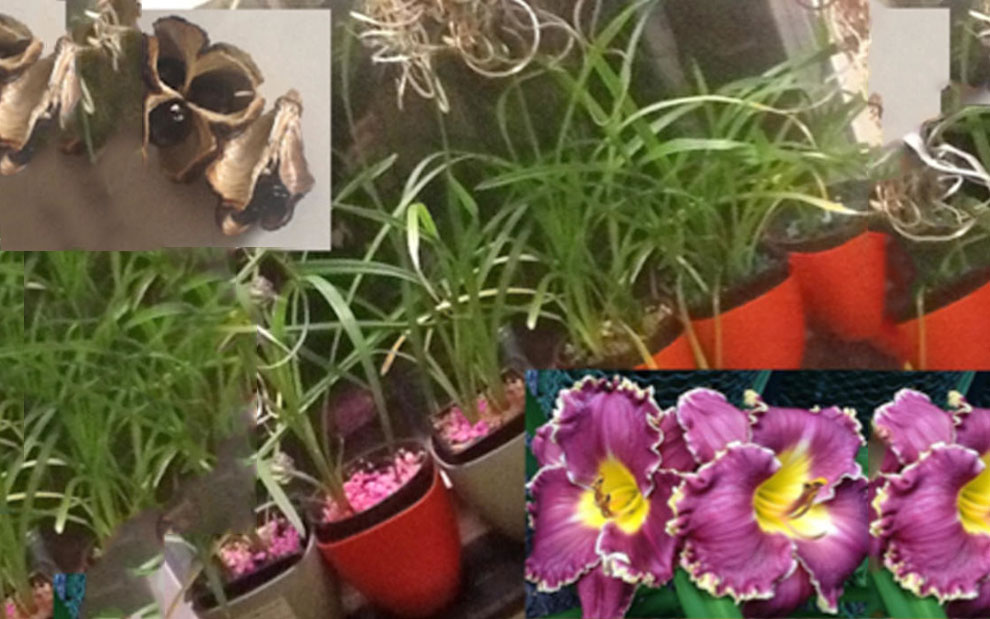
After pollination, you must give your flower some time to yield seedpods. A seed pop is a tiny, green fruit with three lobes growing at the dying flower’s base. The seedpods go from green to brown or yellow as they ripen. Typically, all daylily varieties need at least six to eight weeks to yield healthy seeds.
Step 3 – The collection
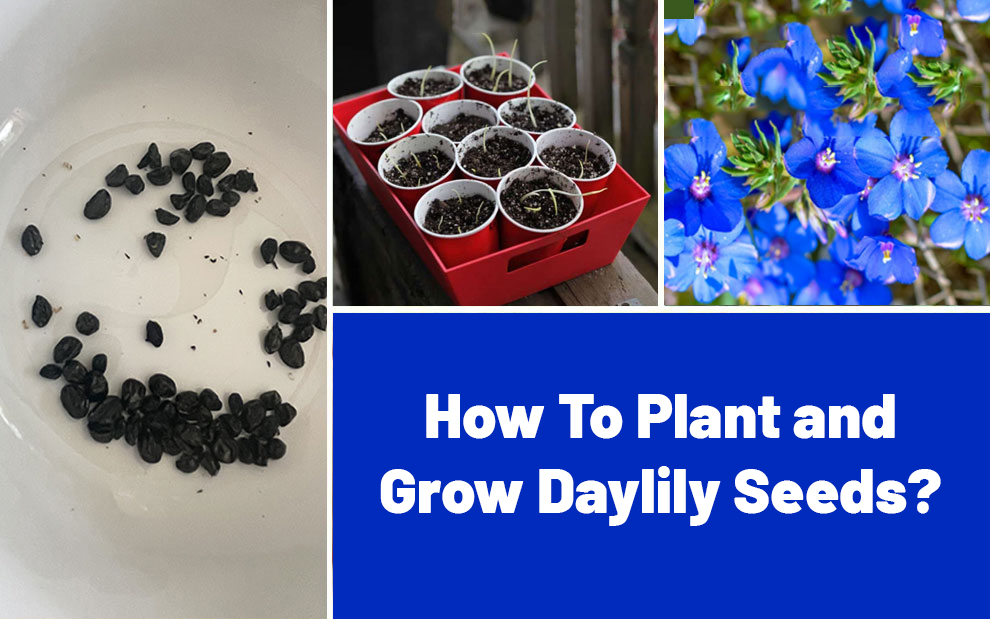
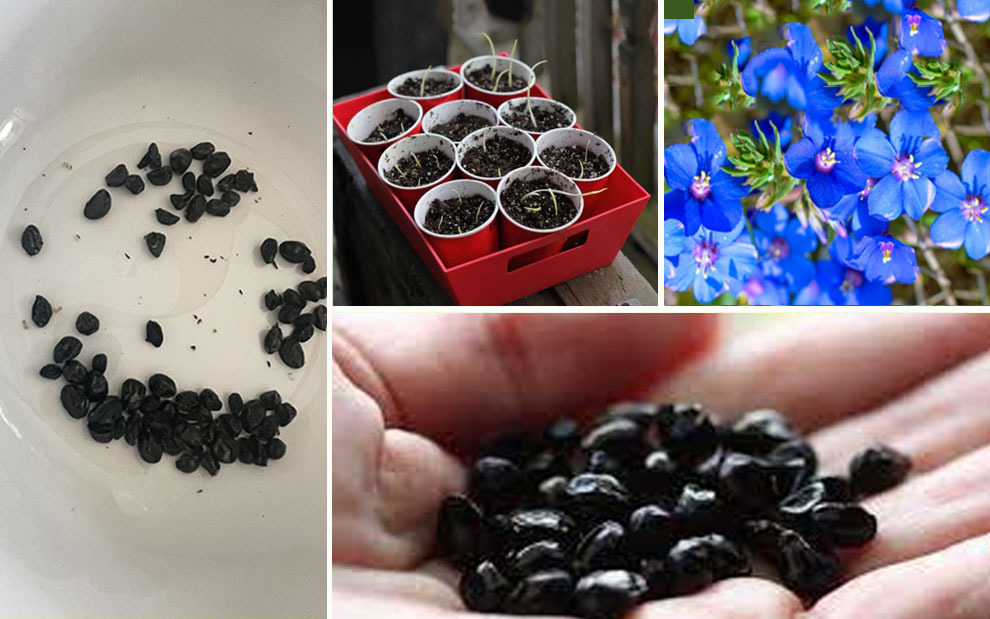
Now pick the black, shiny seeds when the seedpods start cracking open from the top. Each seedpod will have at least six to eight seeds. Keep these seeds on a paper towel and let them air dry completely.
Securely keep them in a plastic container in a dry but cool place. If you see hints of condensation in the container, you should again take the seeds to open air and let them dry. If you reside in humid regions, the drying time may be longer.
You may know how to propagate daylilies from seed, but it will not yield excellent results if you do not know how to keep them properly. So, read below as we discuss storing process.
How To Store Daylily Seeds?
Here are the steps to follow:
- If you self-created a cross, you must always leave a tag inside the zip lock pouch wherein you keep the seeds after collection. It will help you identify the cross.
- Now, place these seeds inside the fridge till they are ready for plantation.
- You can store the seeds in the fridge for almost a year in a dry state. If you do not want the germination to begin, do not let moisture seep into the bag.
How To Stratify Daylily Seeds?

Stratifications mean breaking the outer coating for the seed’s embryonic part. It is vital for germination. To know how to grow daylilies from seed and achieve top results, you must also cold-stratify them in the fridge for thirty days.
Daylilies require cold stratification to cease dormancy and achieve successful germination. Adding moisture to the process further accentuates the stratification and helps you achieve excellent results.
So, adding water to the storage bag that has been in the fridge for months will kickstart the germination process inside the fridge. Of course, they won’t all germinate spontaneously, but it will initiate the process.
There are several ways to conduct stratification in daylily seeds. Here are two of them:
- Add damp vermiculite into a sealed pouch. If the seeds are viable, they will always germinate. However, let this moisture medium sit in the fridge for at least a month before planting.
- Cover the seeds in a damp coffee filter or paper towel and keep them in a ziplock bag in the fridge. However, please ensure that the roots do not weave into the towel, and if that happens, you must be cautious while removing them.
- Wait for a month before you can follow the steps on how to start daylily seeds. However, if the seeds sprout before a month, you can plant them simultaneously.
Some people even soak the seeds in peroxide to trigger germination. You can try whatever works best for you.
Do You Soak Daylily Seeds Before Planting?
Yes, soak the seeds before planting to streamline the germination process.
- Take one oz. of hydrogen peroxide and mix it in two liters of water.
- Pour this mixture into a small bowl and drop your daylily seeds.
- Let the seeds soak into the solution till they sprout.
- The process can take anywhere between 7-10 days.
- At any time, if the solution starts evaporating, keep adding more.
- After two seeds have sprouted, you can plant all of them, regardless of whether they have sprouted.
How To Plant Daylily Seeds?
Here are the steps to follow to plant daylily seeds:
Step 1 – Plant them outside during spring.
Planting the daylilies during the spring is recommended as it gives them the complete growing season to develop the roots before the winter freeze. However, if you reside in warmer regions, you can be flexible on the planting times and choose as per your choice.
Fortunately, daylilies are not fussy about the soil and can thrive when planted outdoors. These can easily tolerate shade and are naturally resistant to insects. On the contrary, daylilies are not very conducive to the indoor environment.
They demand regular daylily fertilizer and intensive artificial lighting. Sadly, many indoor daylilies also do not bloom.
Step 2 – Look for a sunny spot.
The place where you plant the daylilies should get at least six hours of sun every day for them to thrive. So, always select a spot that can easily accommodate this. Daylilies love the direct sun, but a part shade or indirect light will also work.
Step 3 – Till the soil downwards to thirty cm or a foot
As stated, they are not very fussy about the soil, but every plant demands free-draining and moist soil. So, tilling can help you create these conditions for the plant. However, if the soil contains clay or is rocky, you can add some organic compost while tilling.
Step 4 – Soak the bare plant roots overnight in fertilizer
Shop for water-soluble plant food and prepare it following the instructions on the manufacturing label. Place the roots into the solution and allow them to sit overnight. However, if you bought potted plants, you must give them a deep watering solution a night before planting them.
Step 5 – Plant them
Now, dig holes in the dirt at least six inches deep and twelve inches wide, and form a dirt mount amidst every hole.
Cautiously place the bulb into every mound, ensuring that the roots point to the side, ensuring there is at least an eighteen to twenty-four inches gap between two daylilies. Cover the roots and backfill the hole with soil.
Step 6 – Water
Immediately after planting, water the soil, leaving it damp, not soggy.
When Should I Start Daylily Seeds?
We recommend starting the daylily seeds in spring, late summer, or early fall, but you can grow them any time of the year. Planting during this time ensures that the root system develops well before fall arrives.
The robust root system can help the plant to stay in place during spring and winter frosts, preventing them from dying. Ideally, you must not start during the winter, but if that’s what you like, ensure that you employ the bottom heat. So, cover the seeds and start them in a shade house.
Related: How to keep daylilies blooming all summer? | Daylily post-bloom care
Can I Plant Daylily Seeds In The Fall?
Yes, as stated, you can plant daylily seeds during spring or fall. It will give you vibrant flowers, provided you know how to propagate daylilies from seeds.
Winter Sowing Daylily Seeds
You can sow the daylily seeds in the winter by employing the winter-sowing method. Here’s what you need to do:
Plant the seeds in a pot outdoors during the colder weather, ensuring that it has drainage holes.
- Fill the container with nutritious potting mix and plant the seeds in them.
- Now, water deep and well.
- Using the lid or plastic wrap, cover the container forming a mini greenhouse.
- Move the pot to a sheltered spot outdoors.
- Wait for the seeds to sprout in the spring.
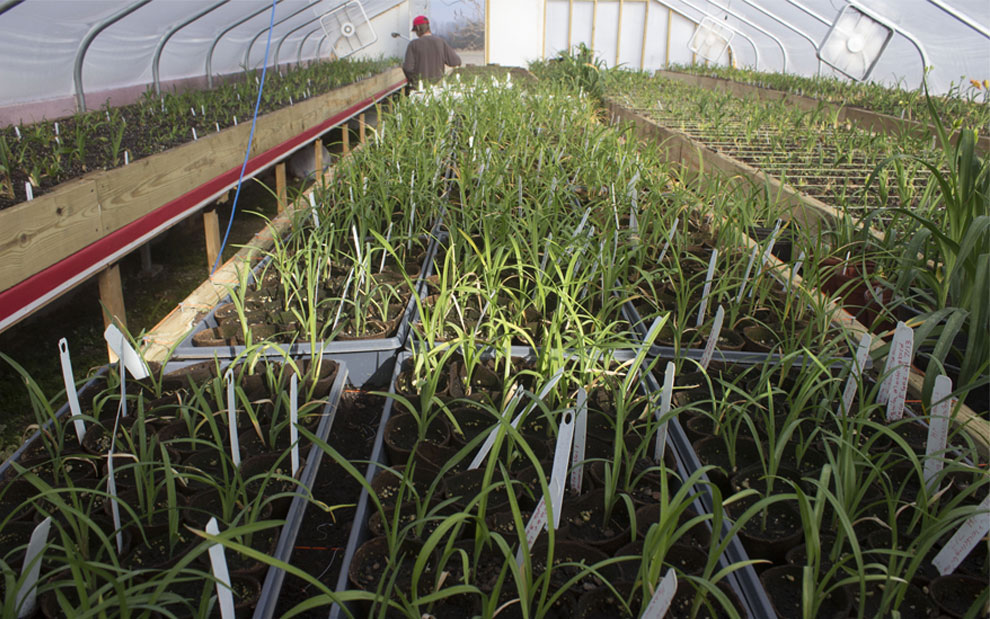
How Long Does It Take To Grow A Daylily From Seed?
Typically, it takes six to eight weeks for the daylilies to sprout from the seeds. In some cases, it might take up to two years to reach their absolute potential. However, they will bloom for many years after they grow, provided you give them the necessary care.
Challenges of Growing Daylilies From Seeds
If you know how to start daylily seeds, you must also know about some of the challenges you may encounter:
- Getting healthy seeds can be the trickiest part of the whole process. Of course, you can shop for seeds from a nursery, but they are not very readily available. You will either buy them from a specialty na¯ursery or order them online. Once you find the seeds, assess their germination rate to know how many are likely to sprout.
- The next challenge you will face is seed germination. Daylilies have a hard outer coating that needs breaking for the seeds to germinate. So, eliminate the hardcover by nicking or scarifying the seeds using a sharp knife. After they are naked, sow them instantly.
- Once sown, it is mandatory to keep them moist at all times. If you let them dry out, they will not germinate. Consider misting them or bottom watering them to maintain the necessary humidity. Alternatively, you can also keep them in a shallow water dish.
- Daylilies are not fast growers. So, patience is crucial. It can take 3-6 months for the seeds to germinate and for plants to show flowers.
However, growing daylilies can be a rewarding experience if you accept the challenge.